A trim-kit cutout cut square, so the microwave sits centered and flush
A built-in microwave only frames up clean when the opening matches the trim-kit cutout sheet, and a drawer model needs a base cabinet converted to carry it. We cut to spec, convert the cabinet, and handle the wiring and venting on the same visit.
- Cutouts cut to the trim-kit spec, not the appliance footprint
- Drawer cabinets re-supported with a load-rated platform
- Over-the-range clearance set to the unit's minimum
Microwaves go in three very different ways, and each one fights the cabinet differently. A built-in needs an opening cut to the trim-kit dimensions or it floats with uneven gaps. A drawer model wants a base cabinet that's been stripped of its drawer box and given real support underneath. An over-the-range unit has to mount to studs, clear the cooktop by code, and route its vent. We do the install and the cabinet prep together, so the microwave lands level, the reveal is even, and you're not waiting on a second trade to make the hole fit.
The problems we actually solve
The trim kit gaps unevenly
Built-in microwaves ship with a trim kit that only looks right when the cabinet opening matches its spec. We cut the cutout square to that dimension so the frame sits flush instead of revealing a crooked gap.
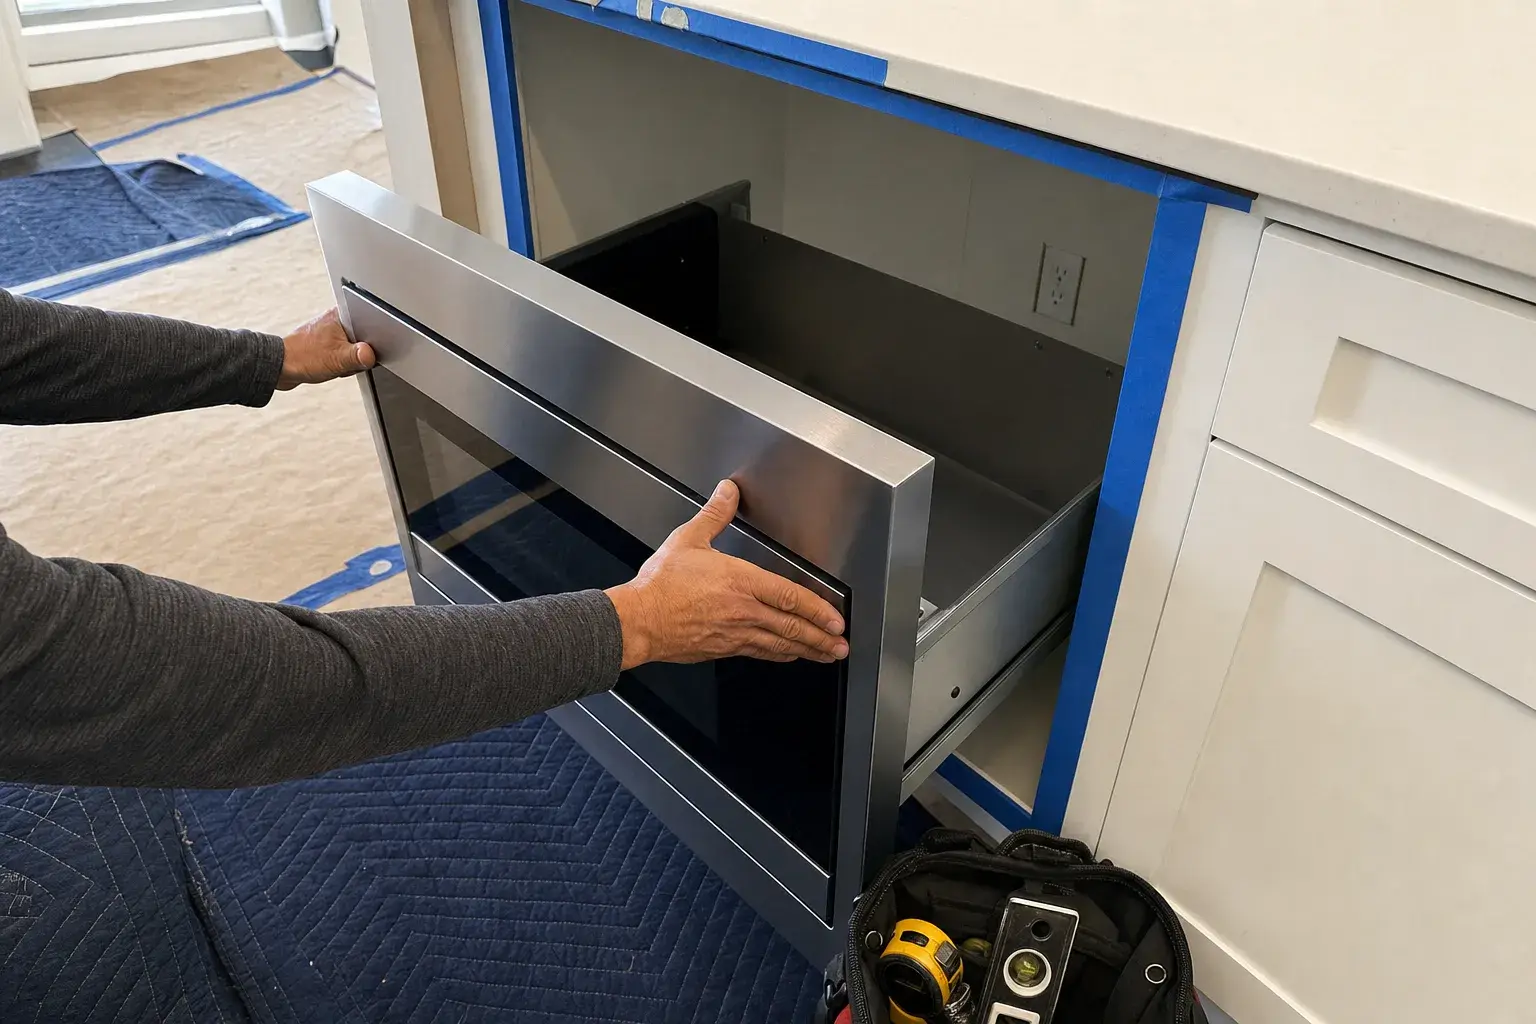
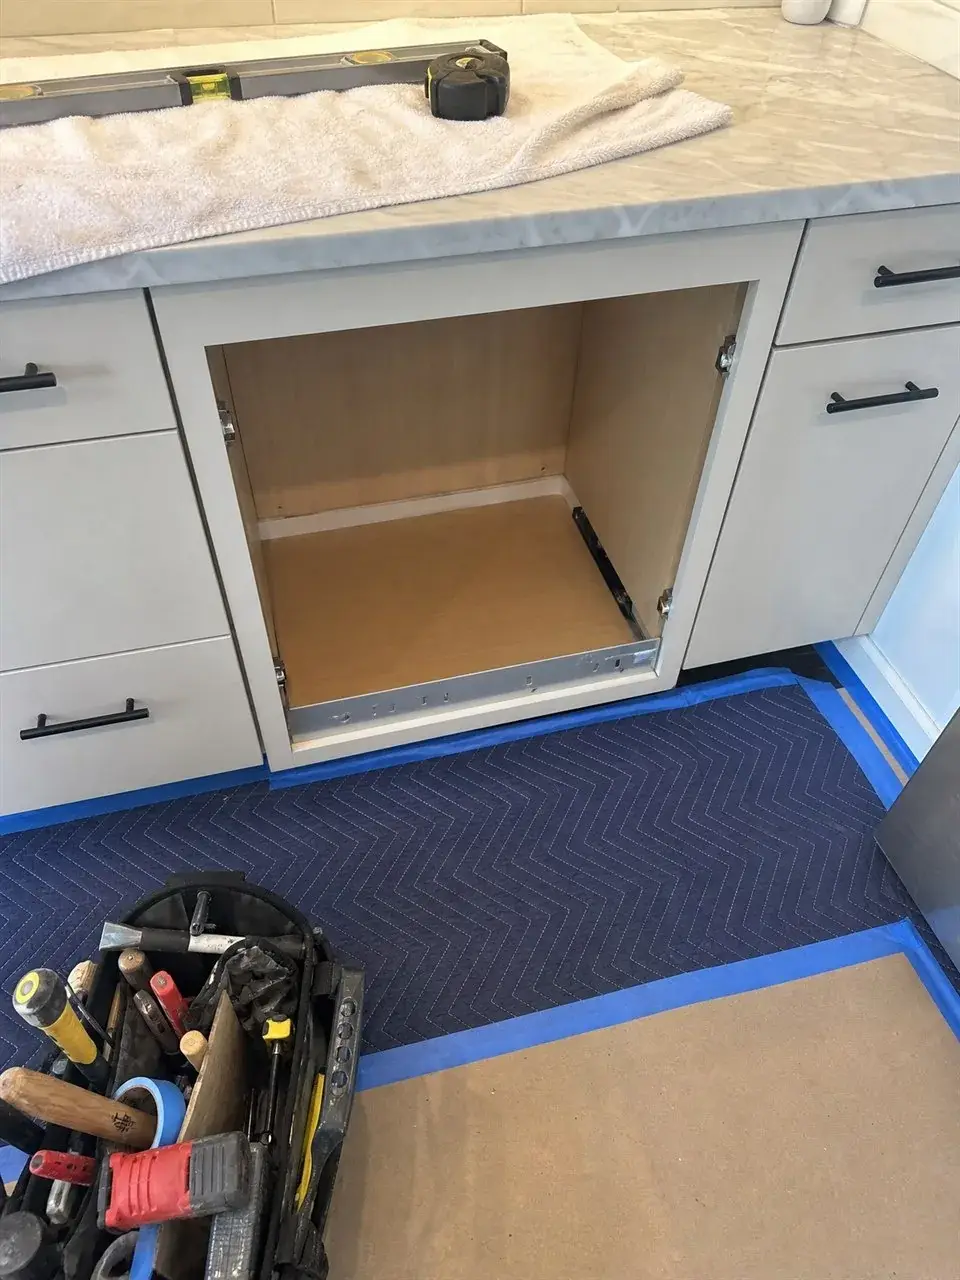
The base cabinet was never built for a drawer
A microwave drawer needs the existing drawer box pulled and a platform that can carry it. We remove the box, add support, and set the unit so it glides without sagging the face.
The over-the-range unit isn't safe yet
These mount heavy and have to clear the cooktop by the manufacturer's minimum. We anchor to studs with the wall plate, hang it at the right height, and connect the duct so it actually moves air.
Microwave Installation, done properly
Cut the built-in cutout to spec
We mark and cut the cabinet opening to the trim-kit dimensions for a built-in or microwave-combo, keeping the cut straight and dust-controlled so the frame seats flush.
Convert a base cabinet for a drawer
The drawer box and slides come out, we add a load-rated platform and cleats inside the cabinet or island, and set the drawer to glide level with the cabinet face.
Mount over-the-range units
We locate studs, fasten the wall plate, set the cooktop clearance to the unit's minimum, and hang the microwave so it carries its own weight without racking the cabinet above.
Handle the electrical
We connect to the existing receptacle, confirm the circuit suits the unit, and route the cord so it tucks out of sight inside the cabinet or behind the unit — no pinched cords or stretched plugs.
Set up the venting
Over-the-range models get configured for recirculating or ducted exhaust, with the blower and damper set the right way and the duct connected so it vents instead of just spinning.
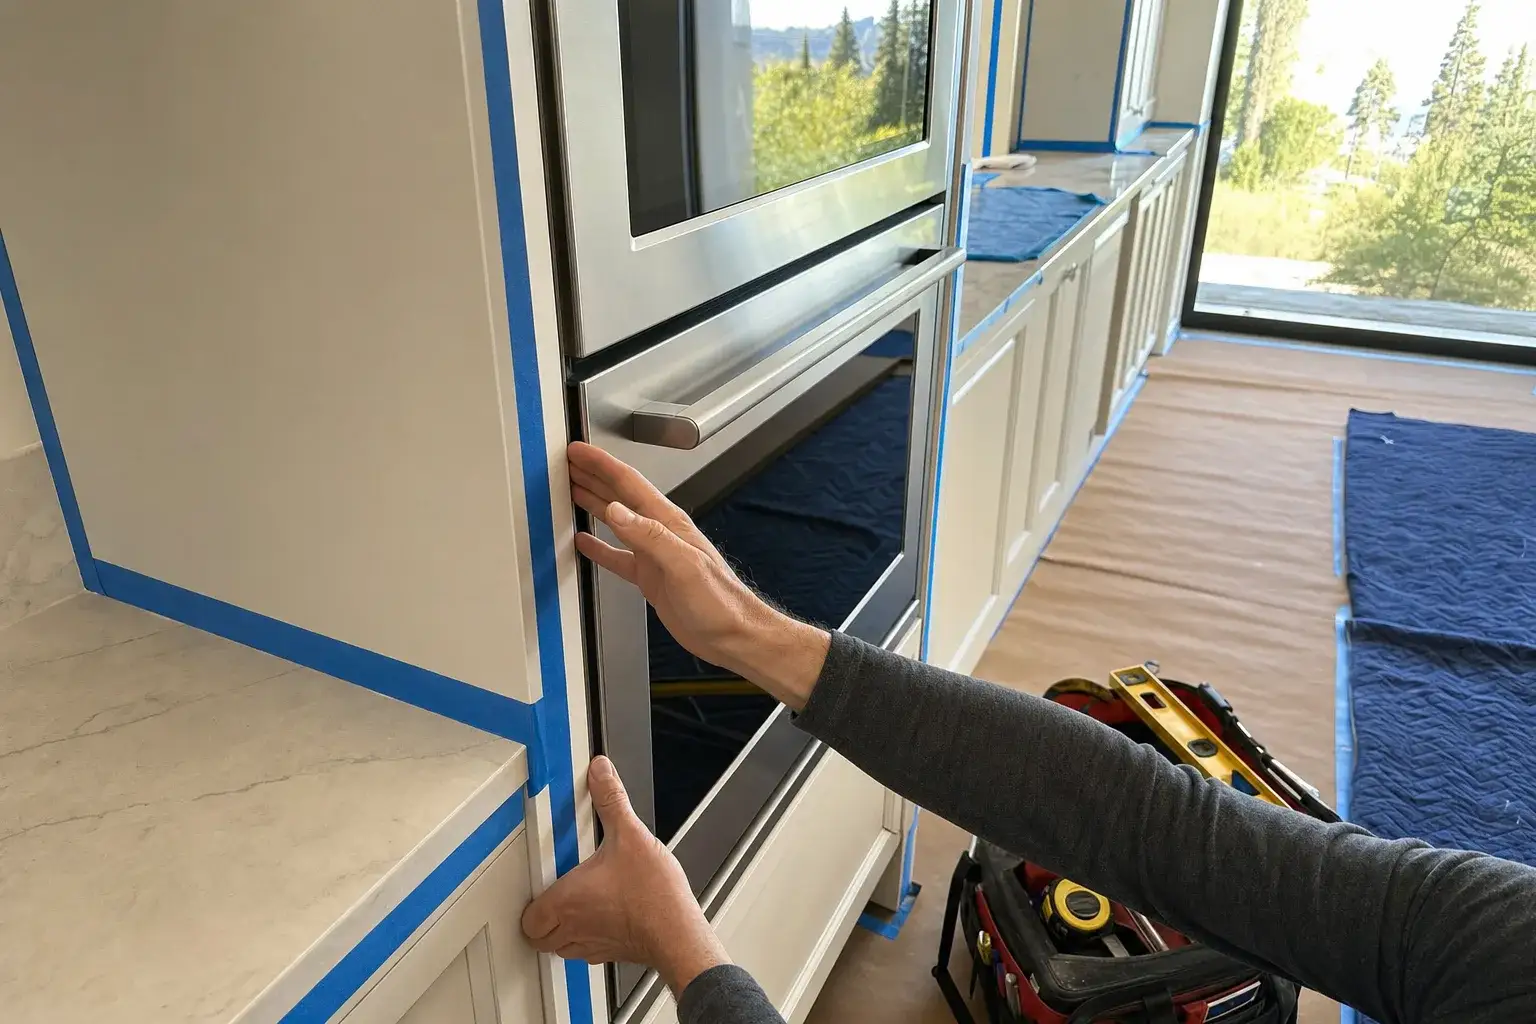
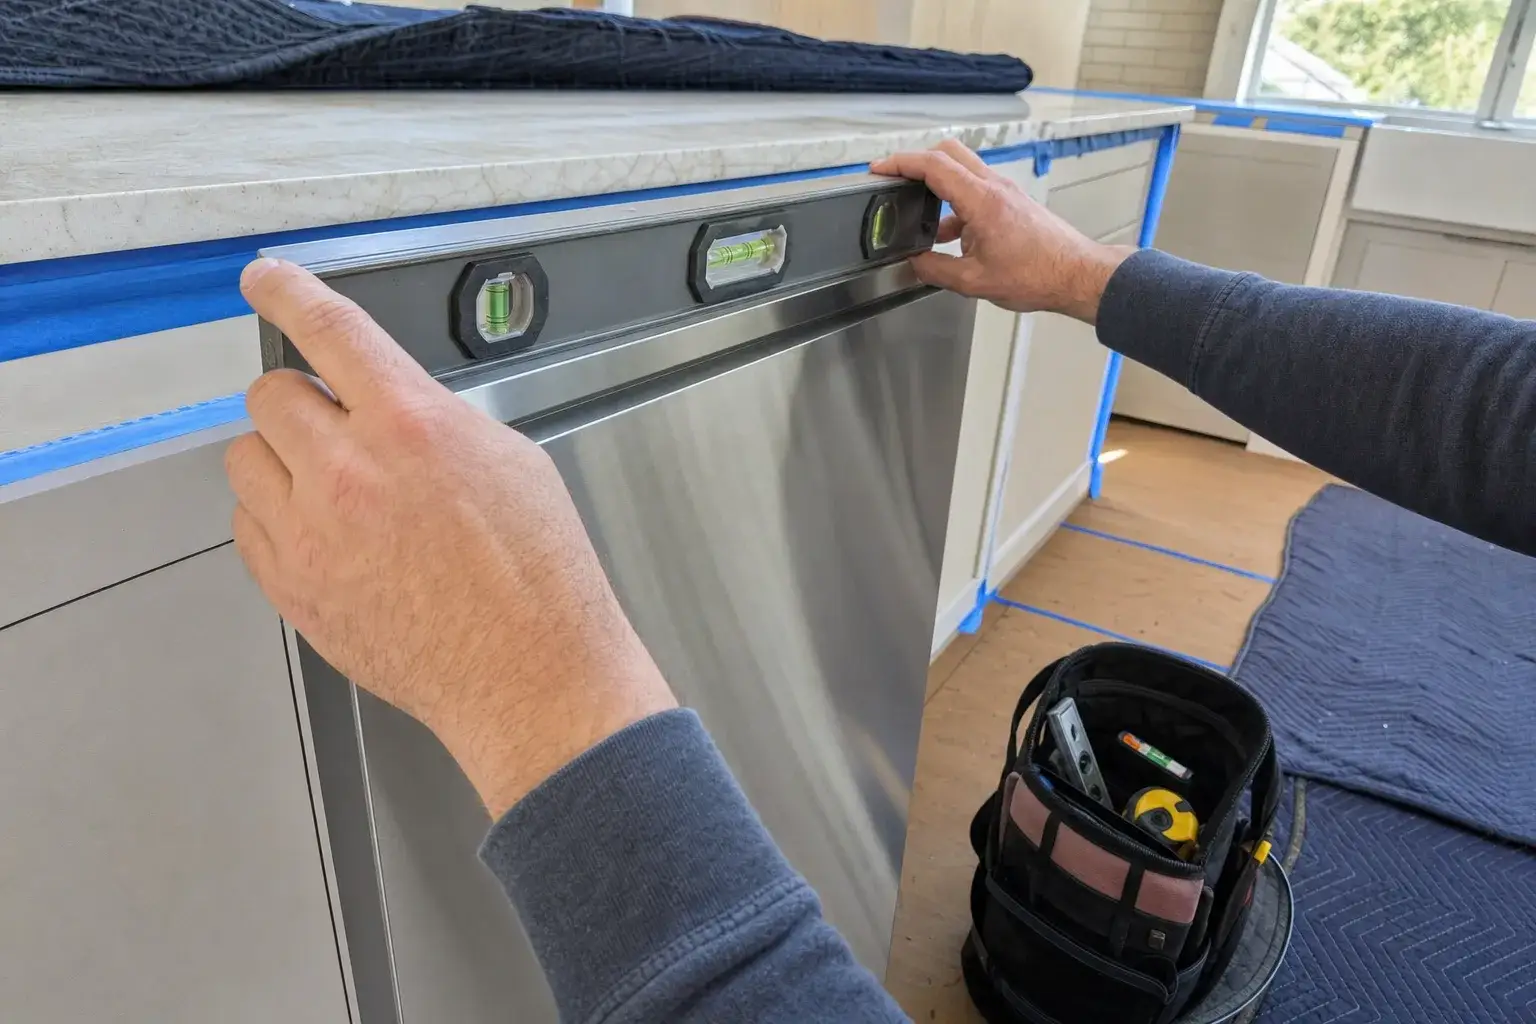
Dial in a flush, centered reveal
We level the unit, center it in the opening, and adjust the trim or filler so the gap measures even all the way around with a feeler gauge before we sign off.
What we account for
-
Cutout dimensions vs. outside dimensions
The number on the box is the unit size, not the hole it needs. Built-ins and drawers have a separate cutout spec, and cutting to the wrong one leaves a gap or a unit that won't seat — we work from the trim-kit and cutout sheet, not the appliance footprint.
-
Circuit and outlet location
Drawer and built-in models expect a receptacle in a specific spot inside the cabinet, and some units want a dedicated circuit. We check what's there before the cut so the cord reaches and the unit gets the power it's rated for.
-
Clearance and venting for over-the-range
There's a minimum height above the cooktop you can't shortcut, and the vent has to either duct out or recirculate correctly. We confirm the clearance and the exhaust path so the install passes and the fan actually works.
The cutout is the whole job
With a microwave, the opening makes or breaks the finished look. A trim kit only frames up clean when the cutout is square to the spec sheet down to the eighth, and a drawer model needs the base cabinet's drawer box pulled and a load-rated platform built in its place — get the cutout a touch wide or the platform a touch low and the reveal tells on you from across the room. We measure off the manufacturer's cutout sheet, cut it square, convert the cabinet, then wire, vent, and set the unit centered in that same opening. The carpentry and the install are one job to us, done by one crew in one visit.
See how cabinet modification worksFrom measurement to a clean, level fit
- 01
Assess & measure
We start with the appliance spec sheet and the opening it has to live in — width, depth, height, the face frame, utilities, and the cabinet around it. Most fit problems are decided here, before a single tool comes out.
- 02
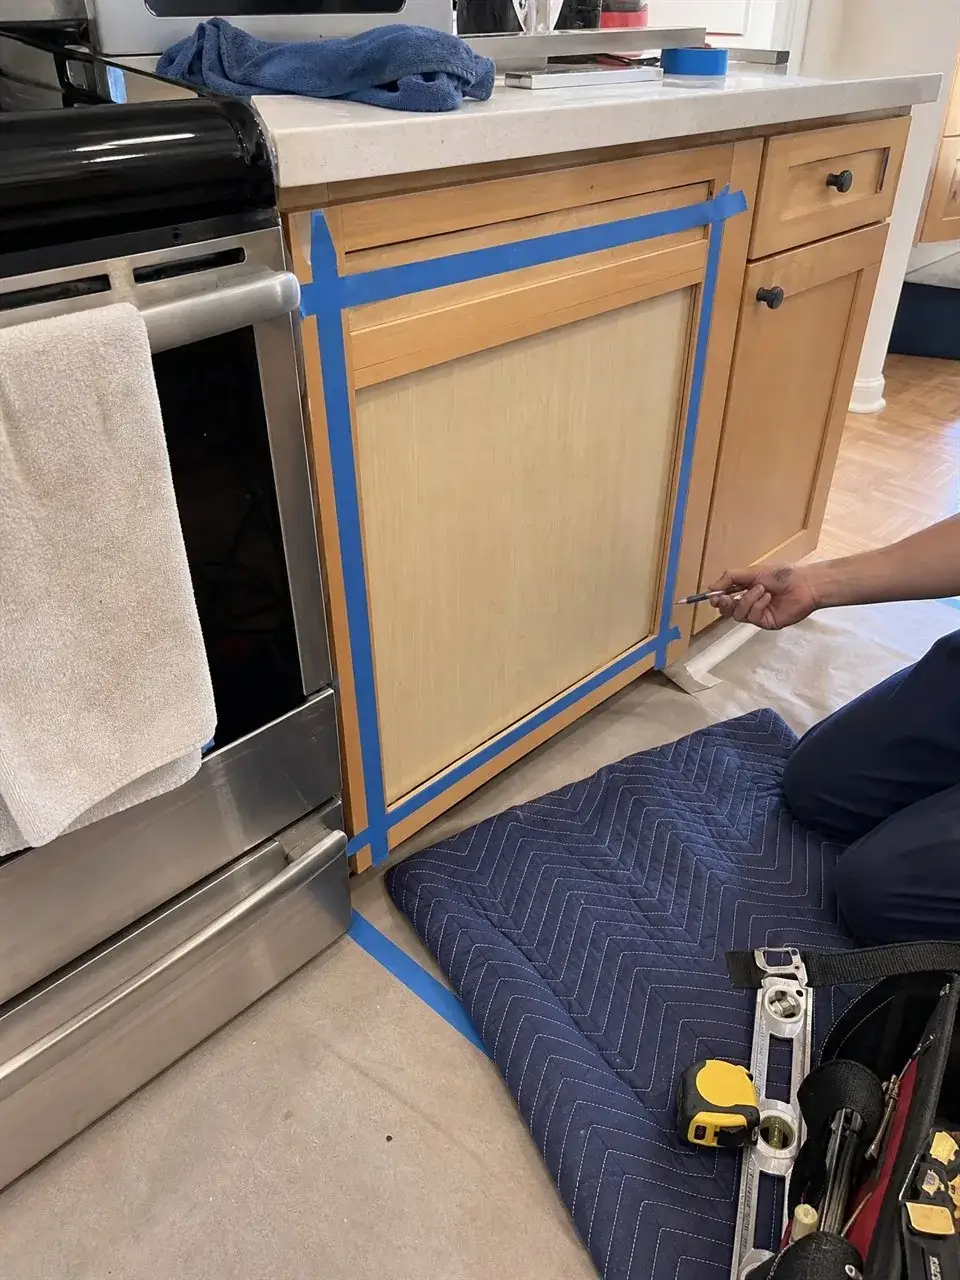
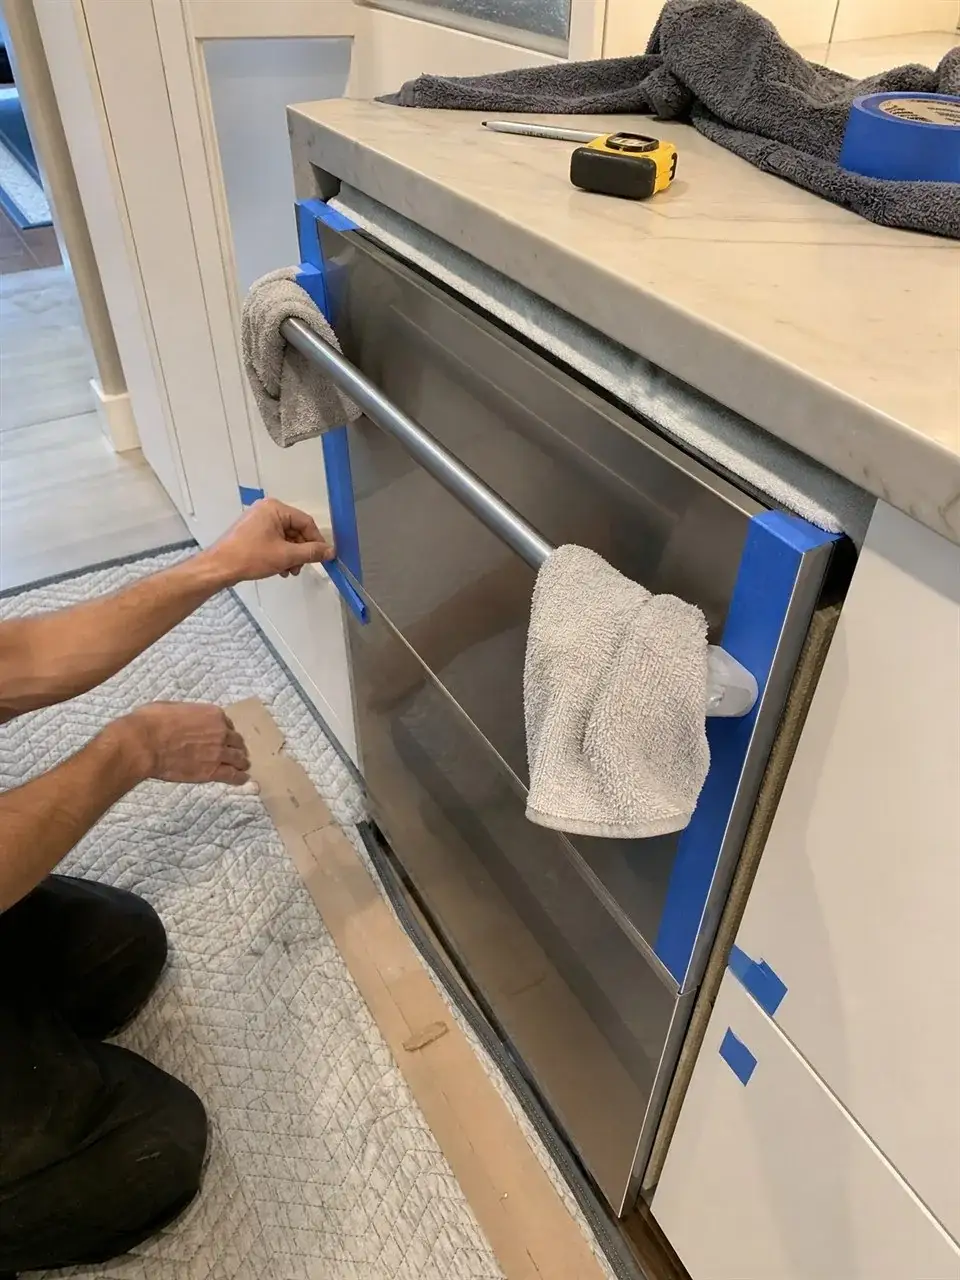
Protect the kitchen
Floors, countertops, and finished cabinet faces get covered, padded, and taped off first. Blue tape on the edges, moving blankets and ram board on the floor, and a vacuum staged for dust control.
- 03
Install & fit the cabinet
We set the appliance — and when it does not drop in clean, we modify the cabinet to make it: resizing the opening, building a support platform, adding filler strips, or aligning panels and trim for an even reveal.
- 04
Level, test & clean
The appliance is leveled, secured, and anti-tip hardware set where it belongs. We test operation, check every reveal and gap, then vacuum and wipe down so the kitchen is ready to use.
What this work looks like in the field
Measuring, protection, and the cabinet detail that makes the fit clean — photographed on real jobs.
Brands we install and fit
- Sharp
- Wolf
- Thermador
- Bosch
- Miele
- KitchenAid
What microwave installation typically costs
A flat $89 service call covers coming out and assessing the job against your appliance spec. Project pricing starts from the figures shown and is confirmed on site — cabinet work has a lot of variables, so we quote it exactly once we see the space.
Microwave Installation: common questions
Can a microwave drawer go into a cabinet that holds drawers now?
Usually yes. We pull the existing drawer box and slides, build a platform inside the cabinet or island to carry the unit, and set the drawer to run level with the face. The cabinet has to be deep and wide enough, which we confirm against the cutout spec before we open it up.
Why does my built-in microwave need a special opening?
Built-ins use a trim kit that frames the unit, and that kit only sits flush when the cabinet cutout matches its dimensions. If the opening is even slightly off, the trim gaps unevenly. We cut the cutout to that spec so the frame seats clean.
Do you handle the venting on an over-the-range microwave?
Yes. We set the blower and damper for either ducted or recirculating exhaust depending on your kitchen, connect the duct, and confirm air actually moves. We also set the clearance above the cooktop to the manufacturer's minimum.
Will the microwave look built-in or just bolted on?
Built-in. We level the unit, center it in the opening, and adjust the trim or filler so the reveal stays even all the way around — the goal is a microwave that looks planned into the kitchen, not added after.
Should I have the cabinet checked before I buy a microwave?
It saves a lot of grief. Cutout and clearance specs vary widely between built-in, drawer, and over-the-range models. Call us to walk your cabinet first and we'll tell you what it can take before you commit to a unit.
Often part of the same job
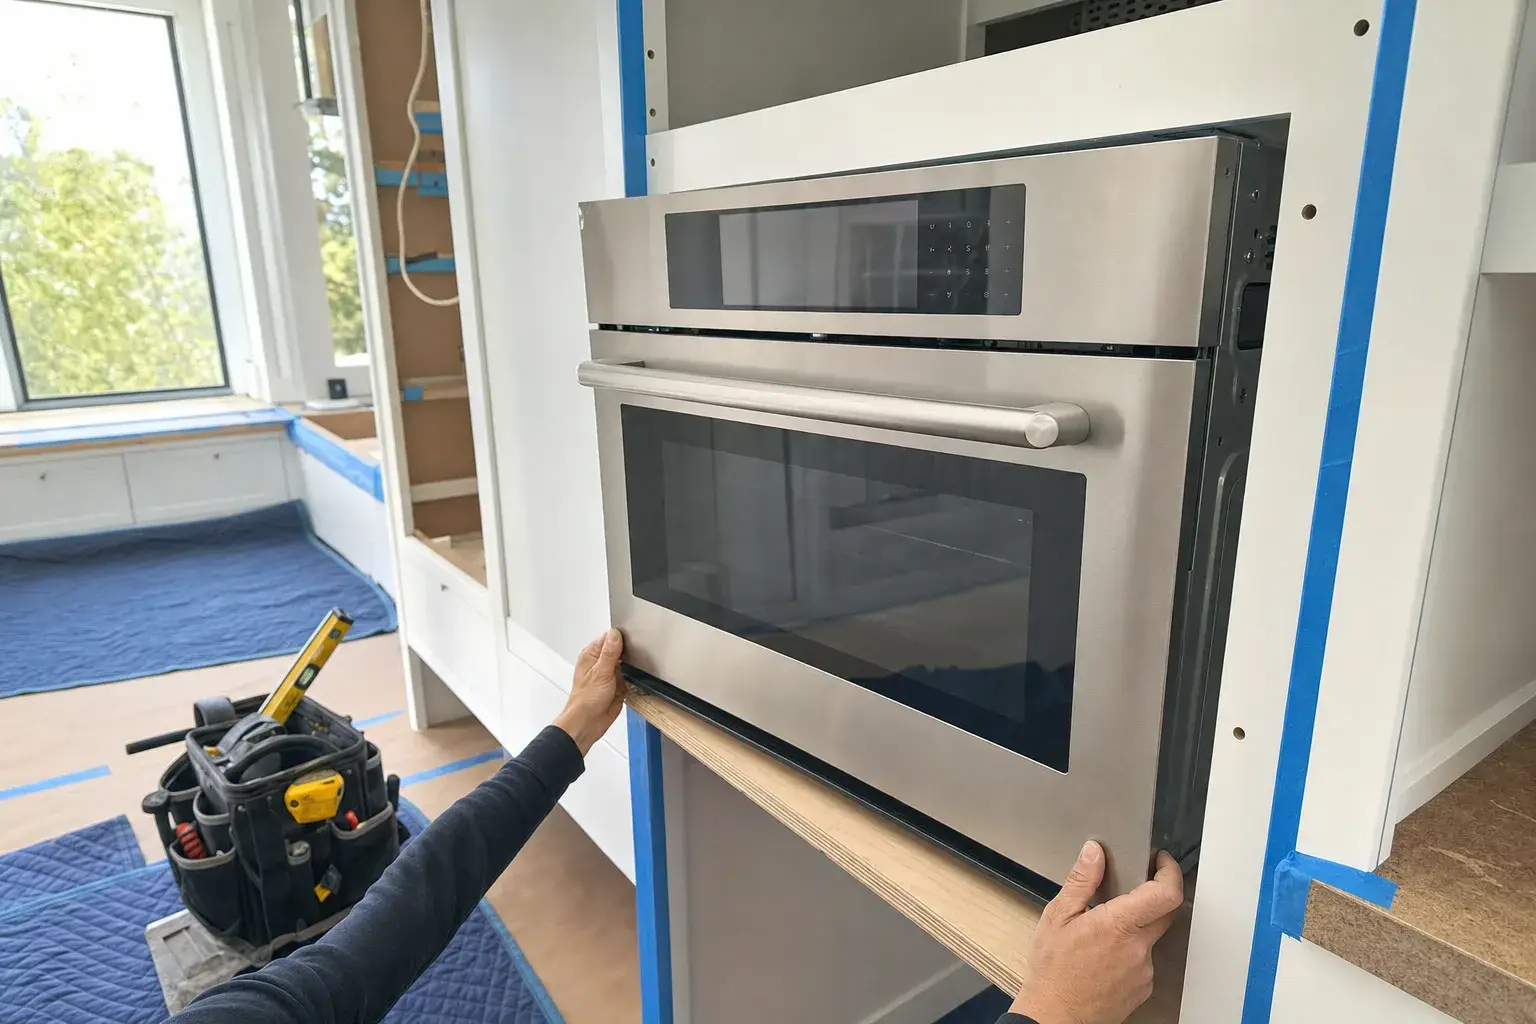
Wall Oven Installation
We set single, double, and oven-microwave combo wall ovens at the manufacturer's mounting height, build the platform that actually carries the weight, and make the two-person lift so the unit seats flush and stays put.
Learn more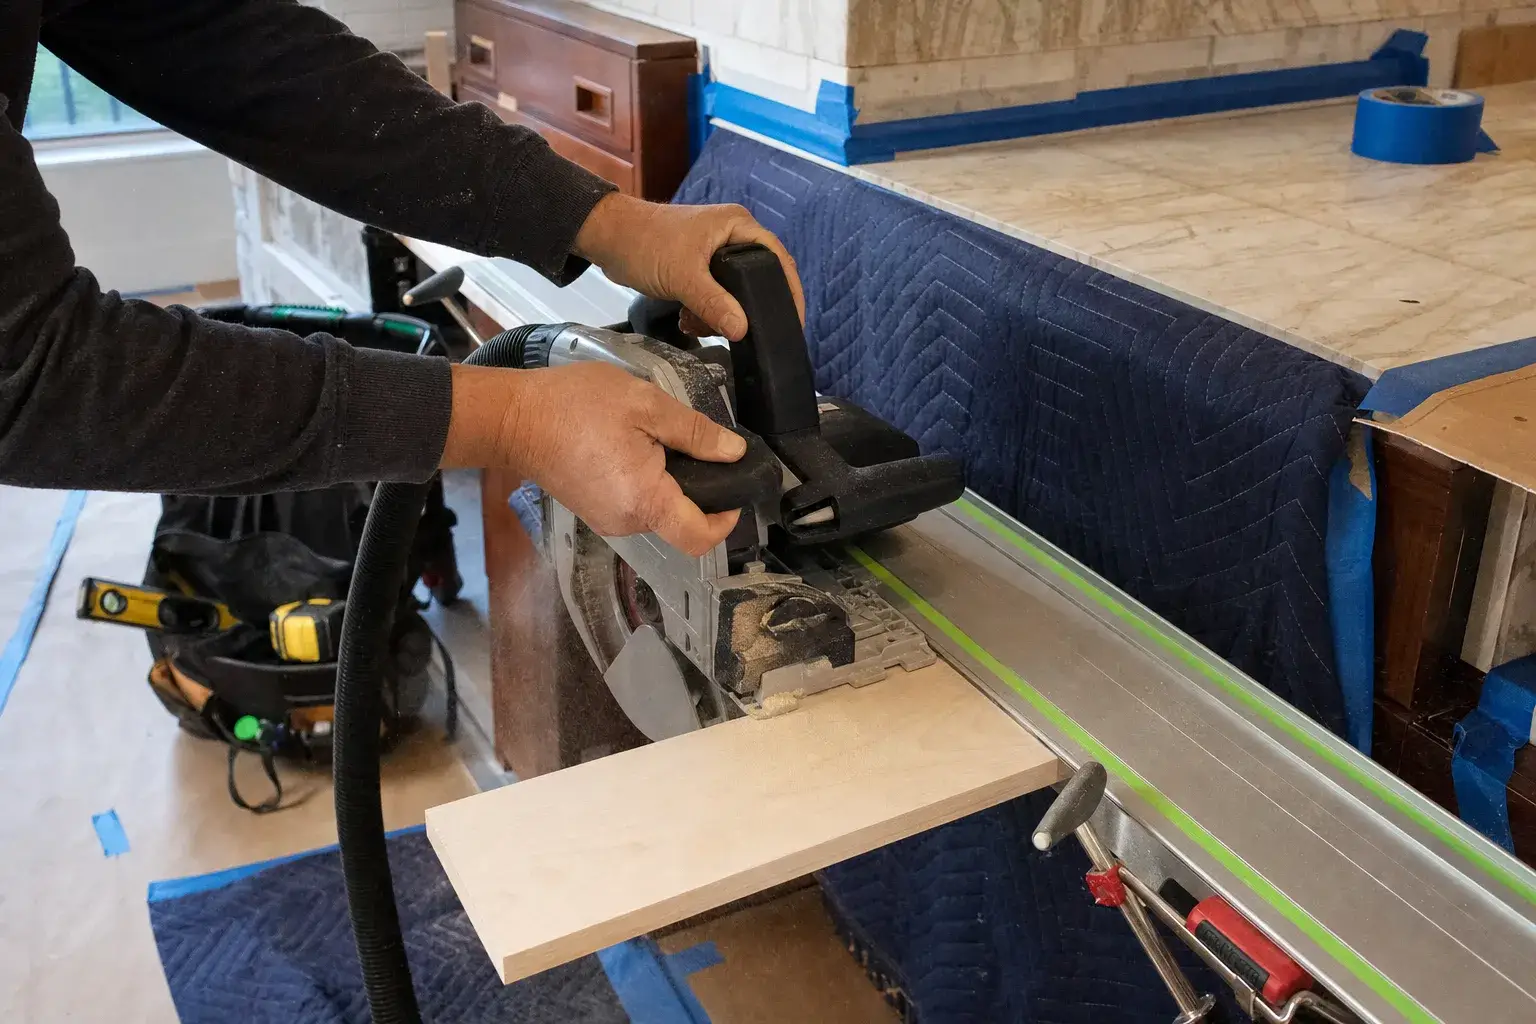
Cabinet Modification
When an opening is a half-inch too tight or a face frame is in the way, we modify the cabinet so the appliance fits — square, level, and damage-free.
Learn moreMicrowave Installation — what homeowners say
Called at 9am, tech was at my place in the Mission by noon. Installed a new microwave over the range. Clean install, no drywall damage. Will use again.
Professional from start to finish. Installed a built-in microwave and wall oven. Everything was level, sealed, and tested before they left. Couldn't ask for more.
Quick and efficient. Installed a countertop microwave mount and a new dishwasher back to back. Brought all the hardware needed. No extra trip to Home Depot required.
Had a tricky over-the-range microwave install — old bracket didn't match. The tech improvised with the right part and got it done. Very impressed with the problem solving.
Had my new Samsung washer and dryer installed same day I called. The tech showed up on time, was professional, and even leveled the machines perfectly. No leaks, no issues. Highly recommend for anyone in the South Bay.
Finally got my LG refrigerator installed after waiting on another company for 2 weeks. These guys came out the next morning. Hooked up the water line for the ice maker, cleaned up after themselves. 5 stars.
Get your appliance opening checked before delivery day
Send the appliance specs and a couple of photos of the space. We confirm the fit, flag any cabinet work, and give you a clear plan — no guesswork on install day.